
When it comes to 3D-printed cosplay helmets, unparalleled personalization is available, but it’s crucial to also pay careful attention to comfort and fit.
Key Points:
The key to padding is materials like EVA foam and memory foam, which provide cushioning and breathability.
Utility knives, spray adhesives, and Velcro strips are the tools of the trade for installing padding.
Proper fitting involves accurate head measurements, choosing the right padding thickness, and considering ventilation.
Advanced techniques include weight distribution, ventilation systems, and modular padding for optimal comfort.

I. Introduction
Creating a comfortable, well-fitting 3D-printed cosplay helmet is as much an art 🎨 as it is a science 🔬. Whether you’re portraying your favorite superhero or bringing a fantasy character to life, how well your helmet fits and feels can make or break your cosplay experience. This comprehensive guide will help you master the essential aspects of helmet comfort and padding.
Why Comfort 🤔 Matters in Cosplay Helmets
Imagine being at a cosplay event, all dressed up as your favorite character, but not being able to enjoy the moment because your helmet doesn’t fit right. A helmet that fits properly means you can wear it for longer periods without discomfort, focus on the event instead of constantly adjusting your gear, avoid headaches and pressure points, move freely and naturally in character, and truly embody your chosen character. Comfort is a crucial factor in ensuring your cosplay experience is as enjoyable and immersive as possible.
What’s happening in the Cosplay World?
Just like any other hobby or industry, the cosplay world is always evolving. However, one thing that remains constant is the significance of comfort. As 3D printing becomes more prevalent among cosplayers for its ability to create custom pieces, the demand for comfortable, functional helmets has grown. Cosplayers are always talking on forums and social media, sharing advice and ideas on how to make helmets more comfortable and better fitting. This guide is here to provide you with the knowledge and tools you need to create a helmet that’s comfortable and enhances your cosplay experience.
What You’ll Learn in This Guide
This guide will teach you how to make a 3D-printed cosplay helmet that is as comfortable to wear as it is impressive to look at. We will explain how to ensure your helmet fits properly, how to add padding, and how to incorporate advanced comfort features. We’ll also address common issues and how to resolve them. After reading this guide, you’ll be able to make a helmet that not only looks amazing but also feels comfortable, even after wearing it for hours.
II. The Basics 📚
Before we delve into the specifics of helmet comfort and fit, it’s important that you have a basic understanding of 3D printing for cosplay and the materials that are commonly used for padding. This information will guide you in making the right decisions when you begin to create your helmet.
How 3D Printing Has Revolutionized Cosplay
3D printing has changed the game for cosplayers everywhere. With this technology, cosplayers can now create stunningly detailed, accurate, and customized replicas of their favorite characters’ helmets. This has created a whole new realm of possibilities for cosplay enthusiasts. But remember, comfort is just as important as looks when it comes to cosplay.
“3D printing is now being used by cosplayers to create detailed and accurate replicas of their favorite character’s helmets, which can also be personalized.”
Despite the many advantages of 3D printing, it’s important to consider the comfort and fit of the helmet to ensure it’s enjoyable to wear. This means selecting the right materials, employing the best padding techniques, and incorporating high-tech features for maximum comfort.
Materials Often Used
The materials used can have a big impact on the comfort of a 3D-printed cosplay helmet. The typical padding materials are EVA foam, memory foam, open-cell polyurethane foam, gel inserts, and fabric-covered foam. Each material has its own benefits, such as being lightweight, malleable, customizable, breathable, and able to absorb sweat. Understanding what these materials can do will help you choose the best one for your helmet.

|
Material |
Key Advantages |
Best Applications |
Density (kg/m³) |
Cost Rating |
Durability Rating |
Maintenance Level |
|---|---|---|---|---|---|---|
|
EVA Foam |
Lightweight, Easy to shape, Heat-moldable |
Basic, customizable padding |
45-55 |
$$/5 |
⭐⭐⭐ |
Easy |
|
Memory Foam |
Conforms to head shape, Pressure distribution, Shock absorption |
Personalized, snug fit |
50-60 |
$$$/5 |
⭐⭐⭐⭐ |
Medium |
|
Open-Cell Polyurethane Foam |
Highly breathable, Absorbs sweat, Soft and comfortable |
Air circulation and moisture management |
N/A |
N/A |
N/A |
N/A |
|
Gel Padding |
Excellent shock absorption, Cooling effect, Targeted cushioning |
High-end projects, maximum comfort |
900-1000 |
$$$$/5 |
⭐⭐⭐⭐⭐ |
Complex |
|
Fabric-Covered Foam |
Improved aesthetics, Moisture-wicking (with the right fabric), Easy to clean |
Professional finish with added comfort |
N/A |
N/A |
N/A |
N/A |
Essential Tools for Beginners 🛠️
Creating a 3D-printed cosplay helmet can be a rewarding project, but it’s crucial to have the right tools on hand. The right tools can make the process more seamless and enjoyable, and they can help you achieve a helmet that fits comfortably and looks great.
- Utility Knife: This tool is necessary for cutting padding materials with precision.
- Spray Adhesive: This tool is used to securely attach padding materials inside the helmet.
- Velcro Strips: This tool allows for removable padding, which makes cleaning and adjustments easier.
- Measuring Tape: Precise measurements are crucial for ensuring the perfect fit.
- Moisture-Wicking Materials: This tool helps keep the interior of the helmet dry and comfortable.

These tools will assist you in cutting, attaching, and adjusting padding materials with ease, ensuring a comfortable fit for your helmet. Remember, having the right tools is just as important as having the right materials.
III. Intermediate Application
Once you’ve got the hang of helmet creation, you’ll probably want to start using more intermediate methods to make your helmets more comfortable and a better fit. These methods include things like design considerations, common fitting adjustments, and effective padding methods.
Designing a helmet requires considering comfort. This includes thinking about the amount of space inside, the placement of the padding, and the quality of ventilation.
Designing for a Comfortable Fit
When you’re designing your helmet, you need to consider how it’s going to sit on your head. A good fit is one that’s secure but not too tight, and it should let you move freely without shifting around on your head. Here’s what you need to keep in mind when you’re working on your design:
- Space for Padding and Ventilation: Ensure there is sufficient space for padding and ventilation.
- Distribution of Padding: Position the padding to prevent pressure points and allow for equal weight distribution.
- Ventilation: Incorporate air channels or vents to enhance ventilation and reduce heat accumulation.
By considering these design features, you can develop a helmet that is both comfortable and practical. Keep in mind, that a well-constructed helmet is the secret to a comfortable cosplay experience.
Typical Fit Adjustments
Even with a well-made cosplay helmet, you may need to make a few adjustments to achieve the perfect fit. These adjustments can help to fix issues such as tightness, looseness, or uneven weight distribution. Here are some common fit adjustments you might want to consider:
- Removing Some Padding: If the helmet is too tight and is causing discomfort, some padding can be removed from the areas causing the discomfort.
- Adding More Padding: If the helmet is too loose, additional padding can be added.
- Adjustable Straps: Straps that can be adjusted can be added to the helmet to ensure it stays on the head and to easily adjust the tightness.
These adjustments can be made to ensure the helmet fits perfectly. Remember, the helmet should be tight enough to stay on the head but not so tight that it causes discomfort.
Padding Techniques That Work
Padding is vital for helmet comfort, offering cushioning and support. Appropriate padding techniques can improve the fit of your helmet and increase its comfort level, making your cosplay experience more enjoyable. Here are some padding techniques that are effective:
Begin by accurately measuring your head to determine the appropriate helmet size. This is a critical step in ensuring a proper helmet fit. Next, identify the areas inside the helmet that require padding, such as the top, sides, and back. Cut the padding material to fit these areas, ensuring the correct thickness. Use spray adhesive or Velcro strips to attach the padding securely inside the helmet. Lastly, put on the helmet and make any necessary adjustments to achieve the perfect fit.
- Measure Your Head: Accurate head measurements 📏 are key to determining the right helmet size.
- Determine Where to Place Padding: Prioritize the top, sides, and back of the helmet for optimal comfort.
- Cut the Padding: Ensure the padding is the right thickness for the best cushioning.
- Secure the Padding: Use adhesive or Velcro to keep the padding in place.
By following these steps, you can create a helmet that fits well and is comfortable, enhancing your cosplay experience. Remember, the padding is what makes the helmet fit just right.
Improving Airflow and Breathability 💨
One of the most important aspects of a comfortable helmet design is ventilation. Proper ventilation helps regulate the temperature inside the helmet and keeps it from becoming too hot. When designing a helmet for extended wear, consider incorporating features that enhance ventilation and make it easier to breathe. This could include air channels, breathable materials, or even miniature battery-powered fans. Consider using moisture-wicking materials to help keep the inside of the helmet dry and comfortable.

Materials and Technologies: What’s New?
In the world of 3D-printed cosplay helmets, staying ahead of the game is key. The industry is always changing, with new materials and technologies that let cosplayers create helmets that are not only comfortable but also functional. Take thermoplastic elastomer (TPE) as an example. This material combines the flexibility of rubber with the durability of plastic, making it ideal for making flexible, impact-resistant padding that fits your head perfectly.
Memory foam, or viscoelastic foam, is a modern material that provides custom padding by molding to the unique shape of your head. This custom-fit increases comfort. Memory foam is particularly useful in areas of the helmet that require extra padding, such as the top and sides.
“Memory foam is ideal for giving tailored padding as it shapes to the contour of your skull, offering a bespoke fit that is a lot more comfortable.”
Integrating these advanced materials into your helmet design can significantly boost comfort and fit, so you can maximize your cosplay experience. By staying up-to-date with new materials and technologies, you can continue to improve your helmet designs and push the boundaries of cosplay.
Managing Temperature and Weight ⚖️
It’s important to stay cool and light when you’re in costume. Wearing a helmet that’s too heavy can put a lot of pressure on your neck and shoulders. Plus, if your helmet doesn’t have good ventilation, you might get too hot. You can avoid these problems by making your helmet out of lightweight materials. ABS plastic and PLA filament are good choices because they’re strong and long-lasting, but they won’t make your helmet too heavy.
As you design your helmet, think about incorporating ventilation systems to control heat. This could include air channels, breathable materials, and small battery-operated fans to boost air circulation. You could also use moisture-wicking materials to keep the helmet’s interior dry and comfy, reducing the risk of overheating.
Finishing Touches and Detail 🎨
Going the extra mile to add finishing touches and details can make your 3D-printed cosplay helmet stand out. Begin by sanding and smoothing out the helmet to eliminate any rough areas. Next, apply a primer to ensure a smooth canvas for painting. Opt for high-quality paints to achieve vibrant colors and realistic effects.
Applying decals, using weathering techniques, or adding metallic finishes can help your helmet appear more authentic. These details can help your helmet stand out and become the centerpiece of your cosplay costume. Keep in mind, that a properly finished helmet doesn’t just look great, it also enhances the overall comfort and fit by ensuring the surface is smooth and uniform.
Unique Challenges and Solutions in 3D Printing for Cosplay Helmets:
|
Challenge |
Description |
Solution |
|---|---|---|
|
Edges of the print lift off the build plate, leading to uneven surfaces or distorted shapes |
– Use a heated build plate and ensure it’s properly leveled | |
|
Layer Lines Affecting Aesthetics |
Visible layer lines can detract from the helmet’s smooth, professional appearance |
– Sand the surface with progressively finer sandpaper |
|
Balancing Detail and Print Time |
High-detail prints can take dozens of hours, which may not be feasible for tight deadlines |
– Print the helmet in multiple parts |
|
Ensuring Durability |
3D-printed helmets can be fragile, especially at thin points or seams |
– Reinforce weak areas with epoxy resin or fiberglass |
|
Achieving a Perfect Fit |
A one-size-fits-all approach rarely works, as head shapes and sizes vary |
– Take precise head measurements and adjust the 3D model accordingly |
Case Study: A Successful 3D-Printed Cosplay Helmet Project
To illustrate the process and challenges of creating a comfortable 3D-printed cosplay helmet, let’s look at the example of Alex, a seasoned cosplayer who designed a Mandalorian helmet for a convention.
The Challenge
Alex wanted a helmet that not only looked screen-accurate but could also be worn comfortably for hours during the event. The primary issues were:
- Weight Distribution: The helmet felt heavy and caused neck strain during initial tests.
- Ventilation: The enclosed design led to heat buildup, making it uncomfortable to wear for extended periods.
- Padding Fit: The padding caused pressure points, especially around the temples and forehead.
The Solution
- Lightweight Materials:
Alex opted for PLA filament for the helmet’s structure due to its lightweight properties. To further reduce weight, non-essential areas inside the helmet were hollowed out using CAD software. - Custom Padding:
Using memory foam, Alex created modular padding that could be adjusted or removed as needed. Velcro strips were used to secure the padding, allowing for easy adjustments during wear. - Ventilation System:
Alex incorporated small air channels into the helmet’s design and installed a battery-powered microfan at the back. This fan was discreetly hidden but provided continuous airflow, keeping the interior cool. - Finishing Touches:
To ensure comfort, Alex lined the interior with moisture-wicking fabric, which helped absorb sweat and kept the helmet dry.
The Result
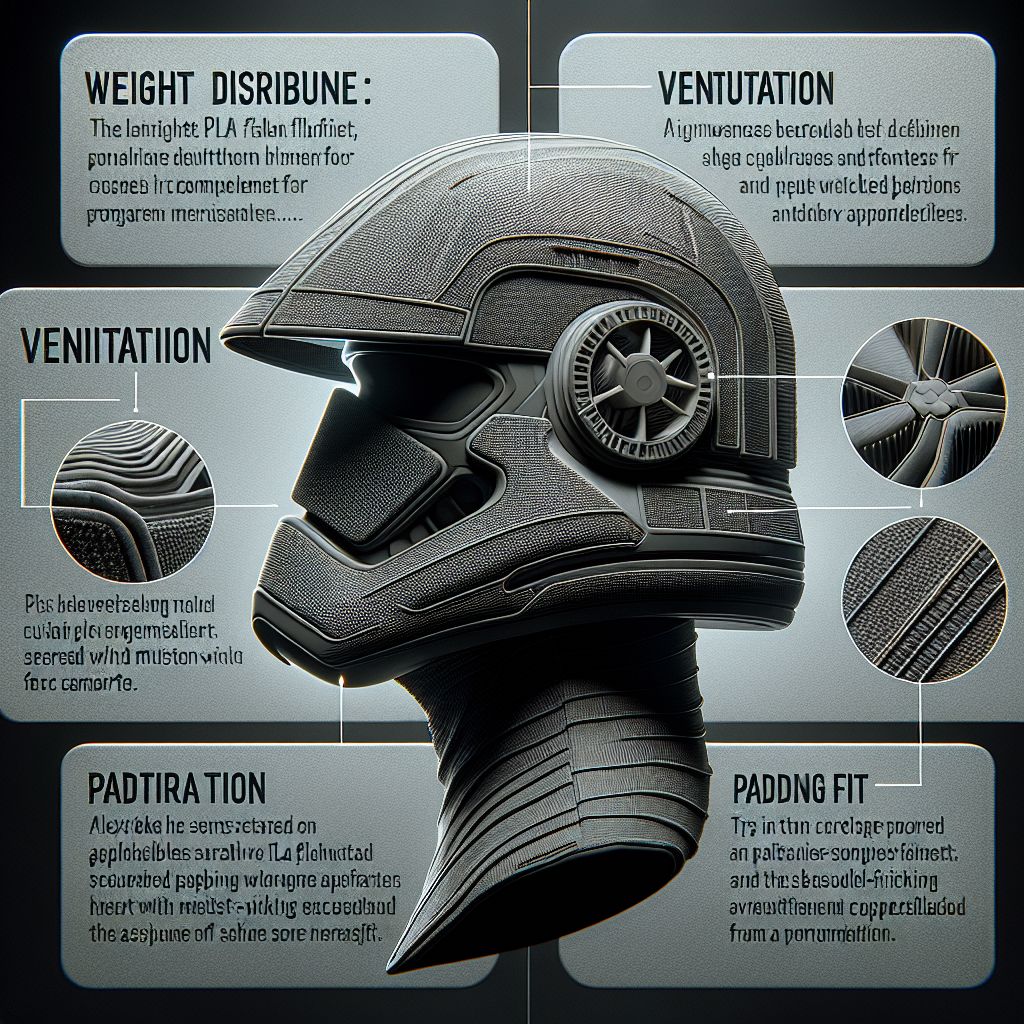
The final helmet was a hit at the convention. Alex was able to wear it comfortably for over six hours, receiving compliments not only for its visual accuracy but also for its innovative comfort features. This project highlights how thoughtful design and attention to detail can transform a 3D-printed helmet into a practical and wearable piece of cosplay.
EXTENDED TECHNICAL INFORMATION 🚀
|
Category |
Details |
|---|---|
|
Padding Thickness (mm) |
Crown: 10-15 | Temples: 8-12 | Back: 12-15 | Forehead: 8-10 | Cheeks: 6-10 |
|
Maintenance Schedule |
– Air out helmet: After each use (Prevents odors and moisture buildup) |
|
Troubleshooting |
– Pressure Points (Uneven padding) |
|
Installation Timeline |
1. Preparation (30m): Clean, mark zones, cut materials, test fit |
Conclusion
Creating a comfortable 3D-printed cosplay helmet requires careful attention to detail and a willingness to experiment with new materials and techniques. By focusing on comfort and fit, you can ensure that your helmet enhances your cosplay experience instead of detracting from it.
This guide covers everything you need to know about the materials and tools you’ll need, as well as basic fitting methods and advanced comfort features. By following these steps, you’ll be able to create a helmet that’s not just practical but also comfortable, allowing you to truly become your chosen character.
Summary of Essential Comfort Techniques
Here is a recap of the primary methods to ensure the optimal comfort and fit of your 3D-printed cosplay helmet:
- Opt for light materials for the helmet’s structure to lessen the burden on the neck and shoulders.
- Integrate ventilation systems, like air channels and breathable materials, for effective heat management.
- Use high-tech materials such as memory foam and TPE for personalized padding solutions.
- Concentrate on a professional finish and meticulous attention to detail to boost both aesthetics and comfort.
By adhering to these tactics, you can create a helmet that is not only visually striking but also offers extraordinary comfort for prolonged use.
Iterative Design: It’s Okay to Make Changes 🎉👍
As you design your helmet, remember that it’s perfectly fine to experiment and adjust your design. Each helmet you create is an opportunity to learn and improve, so don’t hesitate to make changes and tweaks along the way.
Take note of the input from your fellow cosplayers and use it to enhance your designs. By continually honing your skills and trying out new materials, you can push the boundaries of cosplay and create helmets that are not only comfortable but also visually stunning.
Interacting with the Cosplay Community
Interacting with the cosplay community can be a source of a ton of inspiration and support. You can connect with other cosplayers through online forums, social media platforms, and local events to share your own experiences and learn from theirs. Being an active participant in the community can help you keep up to date with the latest trends and techniques, which can help you make even better helmets.
Remember, cosplay is about the love of creativity, character adoration, and teamwork with other cosplayers. If we continue to work together and share our knowledge, we can continue to elevate the art of cosplay and encourage others to join us. So go ahead, make helmets that are as comfortable as they are cool. You’ll thank yourself later, and so will your head!
We’d love to see your finished helmets and hear about your experiences, so don’t forget to use #Cosplay3DPrint 🌟 on social media. If you found this guide useful, we’d appreciate it if you could share it with your friends and fellow cosplayers. For more helpful tutorials and tips, make sure you subscribe to our newsletter.


Leave a Reply