
What You’ll Learn:
Learning the fundamentals of weathering to create battle-damaged 3D-printed helmets.
Methods such as dry brushing and washes add depth and authenticity.
More advanced strategies like oil inking and physical damage imitation.
Addressing common problems like paint sticking and achieving the right level of weathering.
Building a toolkit: necessary materials and resources for weathering your helmet.


Weathering Helmets 101
Every experienced cosplayer knows that it’s all about the details. When it comes to 3D-printed helmets, those details come from the weathering. It’s not just about making something look old or worn; it’s about telling a story. Whether your helmet comes from a far-off fantasy world or the deep reaches of space, weathering is what makes it real. So, let’s get down to business and figure out how to turn your helmet from a shiny new print into a piece of armor with a history.
Choosing the Right Material and Color for Your Helmet
Before we get into the details, you need to decide on the material for your helmet. Most 3D prints are done with either PLA or ABS plastic. PLA is a good choice if you’re new to this, but ABS might need a little more skill. When it comes to color, starting with a neutral base like gray or black is a great idea because it gives you a flexible starting point for adding paint and effects later.
Weathering Basics: Paints and Primers
First things first, let’s talk about paints and primers. A good primer is essential to ensure your paint adheres well. As for paints, acrylics are the way to go. They’re user-friendly, quick-drying, and offer a plethora of color options. Keep in mind that you’re not just painting; you’re laying the groundwork for the weathering effects to follow.
Bringing Your Helmet to Life
Dry Brushing: A Touch of the Past
Dry brushing is your gateway to weathering. This method requires you to dip a dry brush into the paint, remove most of it, and then gently brush over the high points of your helmet. This will accentuate edges and give the impression of wear and tear. It’s as if your helmet has seen a thousand wars—or at least a few conventions.
This is the proper way to dry brush:
Pick a color that’s lighter than your base color. Silver or light gray are good choices for a metallic appearance.
Get rid of any extra paint on the brush until it’s nearly dry.
Lightly brush over edges and elevated details to make highlights.
Keep in mind that the secret to dry brushing is being subtle. You’re aiming to build up the effect slowly, one layer at a time.

Washes: Creating Depth and Authenticity
Washes are the antithesis of dry brushing. Rather than accentuating the highlights, they focus on the shadows. A wash is a thin, see-through layer of paint that seeps into the crevices, adding depth and creating the illusion of age. Imagine it as the grime that’s built up over years of epic quests.
Here’s how you can make a wash:
Combine a darker shade with water or a thinning medium until it’s extremely thin.
Apply it to your helmet, allowing it to settle into the grooves.
Use a damp cloth to remove the excess from the elevated areas.
Washes are most effective when applied in layers. Allow each layer to dry before applying the next to create a deep accumulation of dirt.

Next Level: Advanced Weathering Techniques
After you have a handle on the basics, you can start to add even more personality to your helmet. Advanced weathering techniques can elevate a good piece to a great one, adding the perfect touch of realism that makes people give it a double take. For more detailed methods, check out our finishing techniques and troubleshooting guide for 3D-printed cosplay helmets.
Using Oil Inks to Highlight Details
Oil inks are a great way to add defined shadows and bring out details that might be lost in the overall weathering process. Unlike acrylics, oil inks take longer to dry, which gives you more time to work with the ink and achieve the desired effect.
Using oil paints for weathering involves:
Smudge a tiny bit of oil ink on the areas you want to highlight.
Take a clean brush and feather the edges to create a gradient.
If you mess up, just use a little thinner to wipe it off—oils are very forgiving.
For instance, if you put a dark brown oil ink around rivets and panel lines, it will make them stand out, like they’ve accumulated years of grime and grease.
You can also use oil inks for subtle color changes, to add rust effects, or to mimic fuel stains. The options are only limited by your creativity.
Recreating Physical Damage: Dings and Scuffs
Picture your helmet having survived a sword fight or a laser gun attack. To make this narrative come alive, you’ll need to recreate physical damage.
Though creating dings and scuffs may seem intimidating, it’s really about building up your effects. Begin with a file or sandpaper to make the initial damage. Then, use a mix of painting and dry brushing to highlight the areas.
Here’s a guide on how to create dents and scratches:
Create indentations or scratch marks using a Dremel tool or file.
Give depth to the recessed areas by applying dark paint.
Simulate exposed metal by lightly dry brushing metallic paint over the top.
Adding physical damage gives a tactile element to your helmet that you can’t achieve with just paint. It narrates a story of near misses and narrow escapes.
Less is More
When it comes to weathering, less is often more. It’s all too easy to go overboard and end up with a helmet that looks like it’s been through a meat grinder instead of a battle. The trick is to apply your effects gradually and think about how different weathering techniques will play off each other.
Understanding the Power of Subtlety
Often, the most effective weathering is the kind that isn’t immediately obvious. It’s the subtle color changes, the barely-there scratches, and the smallest hints of rust that can make your helmet feel like it’s seen battle. If you’re unsure, step back and take a look at your helmet from a distance. If it looks good from far away, you’re doing well.
Creating Depth with Layering: A Fine Art
Layering is not just about piling on more; it’s about adding the right kind of more. Each layer should tell a story. Did your helmet get that scratch from a fall, or was it from an enemy’s sword? Is that rust from years of disuse or from a particularly gruesome battle?
Here’s how to master the art of layering:
Initiate with wider effects such as washes and dry brushing.
Proceed with particular details like oil ink shadows and physical harm.
Conclude with subtle touches like tiny scratches, rust spots, or dust build-up.
Every layer should enhance the others, establishing a unified story across the surface of your helmet.

Transforming Obstacles into Works of Art
Weathering isn’t always a walk in the park. You’ll meet obstacles on your journey, but with a little bit of knowledge, you can transform those obstacles into chances for inventiveness.
Addressing Issues with Paint Sticking
3D-printed objects often have a surface that’s too smooth for paint to adhere properly, which is a common problem. To solve this, lightly sand your helmet before you begin priming. A quality primer can also make a big difference in providing a surface to which paint will adhere.
Quick tip:
Once you’ve finished sanding, give your helmet a good scrub with soapy water to get rid of any leftover dust and oil.
Next, apply a plastic-specific primer and let it dry completely before you start painting.
With the primer dry, your helmet is now prepped and ready for painting and any weathering techniques you want to use.
Keeping it Real:
Weathering is about keeping it real. You want to make something that looks authentic and detailed but not too much. Think about where the helmet would naturally get worn out and focus on those areas. Edges, raised details, and areas that would often touch other objects are great places for weathering.
Keep in mind:
It’s better to underdo it than overdo it. You can always add more weathering, but it’s harder to remove it.
Use photos of real worn objects to guide your technique.
Keep your weathering balanced by stepping back and looking at the helmet as a whole.
By keeping things balanced, you make sure your helmet tells a believable story—one that’s full of history and life. For more detailed techniques, check out our 3D-printed cosplay helmet paint guide.
Unleashing Your Creativity
Having mastered the basics and overcome the usual hurdles, you’re now free to let your imagination run wild. Weathering is as much about artistry as it is about technique. So, don’t hesitate to go beyond the conventional. Mix techniques or even come up with your own to create a truly unique effect.
Going Beyond Conventional Techniques
Be creative. Use unconventional materials such as cinnamon to simulate rust or crushed eyeshadow for dirt. You can also apply heat to slightly distort areas for a battle-damaged effect. Every new method you experiment with could become your unique style, the element that makes your work distinctive among others.
Here are a few suggestions to get your creative juices flowing:
Combine paint and baking soda to generate a rust-like texture.
Use a sponge to dab on paint for a speckled, aged appearance.
Apply heat to alter or distort sections of the helmet to give it a battered appearance.

Keep in mind your creativity is the only boundary. Every helmet is a blank canvas awaiting your unique touch.
Show Off Your Creation: Community Engagement and Critiques
After you’ve added the weathering effects to your helmet, don’t hide it away. Show it off to the cosplay community. Social media platforms like Instagram, Reddit, and various cosplay forums are excellent places to display your work and receive critiques. You’ll discover that the community is extremely encouraging and filled with individuals who are equally as enthusiastic about cosplay as you are.
Receiving input from others is priceless because:
It gives you a fresh perspective on your work.
You can gain knowledge from the experiences and strategies of others.
It’s inspiring to receive praise and acknowledgment for your efforts.
Above all, sharing your work links you with a worldwide community of artists, all developing and evolving together.
Enhancing Your Artistic Skills
As you continue to explore the art of helmet weathering, keep in mind that each piece you create is an opportunity to learn. With each helmet, you’ll find new techniques and enhance your abilities. The aim is not to get it perfect the first time but to improve with each new project.
Where to Look for Helmet Weathering Tips
You don’t have to go it alone when you’re learning how to weather your helmet. There are so many resources out there that can help you get better at it. You can find everything from YouTube tutorials to cosplay workshops. And if you want to dive even deeper, there are books about model painting and weathering that can give you a more in-depth understanding of the craft.
Model painting and cosplay YouTube channels.
Cosplay workshops at hobby stores or conventions.
Books and magazines on model painting and weathering techniques.
Don’t stop learning, experimenting, or asking for advice. The more you know, the better your weathering will be.
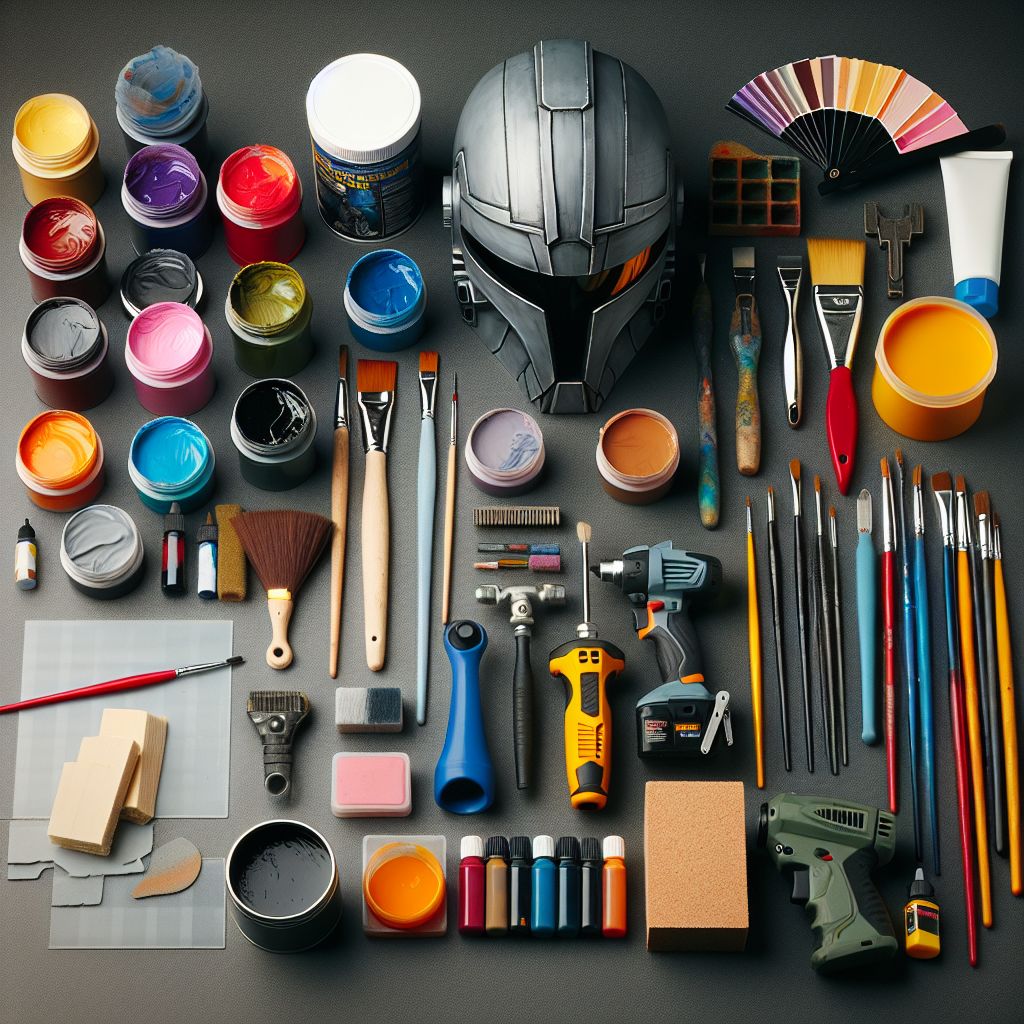
Toolbox Essentials: The Must-Have Tools for Weathering
Your toolbox is your ultimate partner in the weathering journey. Here’s what you need to kick off:
A variety of colors of acrylic paints.
Different brushes, including flat and fine-tip.
Plastic primer.
Sandpaper or a sanding block to prepare the surface.
Dremel tool to create physical damage.
Oil inks for detailed work.
Protective finish to protect your work.
With these tools, you’ll be ready to handle any weathering project.
FAQ: Becoming a Pro at Helmet Weathering
We’ll tackle some commonly asked questions to help you become a pro at helmet weathering.
What Paints Should I Use for My Helmet?
Acrylic paints are a great choice because they’re easy to use and dry quickly. Try to find paints that are made specifically for plastic and model use. These types of paints will stick to your 3D-printed helmet better and are meant to be layered for weathering effects.
Is it Possible to Weather a Helmet Using Only Physical Techniques?
Indeed, physical techniques such as sanding, carving, or applying heat can be used to achieve a weathered look. However, for a more realistic effect, it’s recommended to combine these techniques with painting.
What Should I Do If I Mess Up While Weathering?
No worries! Most errors are fixable. If the paint hasn’t dried yet, you can just wipe it off with a wet rag. If it’s already dry, you can either paint over it or sand it off and start from scratch. Keep in mind that weathering is all about layering, so a mistake might just add to the final look.
What Are Some Easy Weathering Techniques for Beginners?
For beginners, dry brushing and washes are excellent techniques to start with. They are not only easy to do but also easy to control. Once you get the hang of it, you can then try more complicated techniques such as oil inking and simulating physical damage.
How Can I Make My Weathering Look Authentic?
Look at real-life examples of wear and tear. Check out old machinery, tools that have been used a lot, and armor that’s seen battle. Pay attention to where rust builds up, paint peels off, and metal gets scratched. Use what you see to guide your weathering and make it look authentic. For more detailed guidance, you can follow Apollo’s Weathering Tutorial on The Dented Helmet forums.
Ready for Battle: Final Words on Weathering Your Helmet
Weathering your 3D-printed helmet is a voyage of imagination and skill. It’s about narrating a tale and materializing a fragment of your creativity. With perseverance, experience, and an eagerness to learn, you can create helmets that appear as if they’ve survived epic wars and fantastic journeys. So, pick up your tools, let your creativity run wild, and start the weathering process!
Don’t forget, “A knight in shining armor is a man who has never had his metal truly tested.” Let’s give your helmet a workout and see the amazing tales it can spin.
In this comprehensive guide, we’ve explored the world of weathering techniques for 3D-printed helmets. From choosing the right materials and colors to advanced methods like oil inking and physical damage imitation, you now have the knowledge and tools to create battle-scarred and authentic-looking helmets for your cosplay projects.
Remember, the key to successful weathering is to start with a solid foundation and gradually build up layers of depth and detail. Don’t be afraid to experiment and get creative, as the most unique and impressive results often come from thinking outside the box.
As you embark on your own weathering projects, keep in mind the importance of subtlety, layering, and storytelling. With practice, patience, and a willingness to learn from the community, you’ll soon be creating helmets that look like they’ve been through epic adventures.
Now that you’ve learned the secrets of weathering 3D-printed helmets, it’s time to put your skills to the test. Share your weathered helmet photos in the comments section below, along with any tips, tricks, or lessons learned along the way. Let’s build a community of weathering enthusiasts and push the boundaries of what’s possible with 3D-printed cosplay.
So, what are you waiting for? Get out there, start weathering, and show us what you can create!
This shortened version maintains the essential elements of the conclusion and call-to-action while keeping the overall length more appropriate for the blog post. Feel free to adjust it further to find the perfect balance for your content.
As we wrap up, the following grid provides a structured overview of the key concepts discussed in this post. Use it as a quick reference to reinforce your understanding and explore the connections between the main ideas:


Leave a Reply